
Installing car parts can seem daunting, but with the right approach, it becomes a manageable task. Whether you’re a seasoned mechanic or a DIY enthusiast, understanding how to install car parts correctly is crucial for maintaining your vehicle’s performance and safety. This article will guide you through the essential steps of installing car parts, offering tips to ensure a smooth and successful installation.

Why Proper Installation of Car Parts Matters
Firstly, proper installation of car parts is critical for ensuring your vehicle operates safely and efficiently. Incorrectly installed parts can lead to poor performance, increased wear and tear, or even safety hazards. Therefore, knowing how to install car parts correctly helps maintain your vehicle’s reliability and longevity, reducing the need for frequent repairs and improving overall driving experience.
Preparing for Installation
1. Gather Tools and Equipment
Before you begin, it’s essential to gather all the necessary tools and equipment. Common tools needed for installing car parts include wrenches, screwdrivers, pliers, and a jack. Additionally, you may require specific tools depending on the part being installed, such as a torque wrench or special adapters. Having everything on hand will streamline the process and prevent interruptions.
2. Consult the Vehicle Manual
Consulting your vehicle’s manual is an important step in preparing to install car parts. The manual provides detailed instructions and specifications for your vehicle, including part compatibility and installation procedures. Following these guidelines ensures that you use the correct parts and adhere to the proper installation techniques.
3. Ensure Safety Measures
Safety is paramount when installing car parts. Make sure the vehicle is parked on a flat surface and the parking brake is engaged. Use jack stands to support the vehicle if you need to lift it, ensuring that it is securely positioned. Wearing safety gear, such as gloves and safety glasses, will help protect you from potential hazards during the installation.
Steps for Installing Car Parts
1. Remove the Old Part
Start by removing the old part that you’re replacing. This typically involves loosening bolts or screws, disconnecting any attached components, and carefully removing the part from its position. For example, when replacing brake pads, you would need to remove the caliper and the old pads before installing the new ones. Take care to keep track of all fasteners and components for reassembly.
2. Prepare the New Part
Before installing the new part, ensure it is compatible with your vehicle and is free from defects. Compare it with the old part to confirm that it matches in size and design. Some parts may require additional preparation, such as greasing or adjusting, before installation. Checking the new part’s specifications will help ensure a proper fit and function.
3. Install the New Part
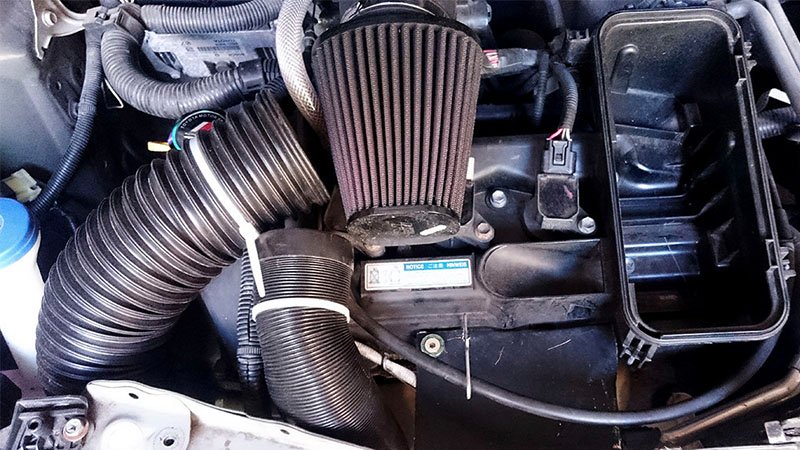
Next, install the new part by following the reverse process of removal. Position the part correctly and align it with the mounting points. Secure the part using the appropriate bolts or screws, tightening them to the recommended torque specifications. For instance, when installing a new air filter, place it in the filter box and ensure it is seated properly before securing it.
4. Reconnect Any Detached Components
If the installation requires disconnecting any components, make sure to reconnect them properly. This may involve reattaching electrical connectors, hoses, or other parts. Double-check all connections to ensure they are secure and correctly aligned. For example, when installing a new alternator, reconnect the electrical connectors and ensure they are firmly attached.
5. Test and Inspect
After completing the installation, perform a thorough inspection to ensure everything is properly installed and functioning. Test the vehicle to check for any issues related to the new part. For instance, after installing new brake pads, pump the brakes to ensure they are functioning correctly and check for any unusual noises. Address any issues immediately to ensure the part performs as expected.
Post-Installation Tips
1. Regular Maintenance
Regular maintenance is essential to keep installed car parts in good condition. Follow the manufacturer’s recommendations for maintenance and replacement intervals. Regularly check the performance of the installed part to ensure it continues to function correctly and address any issues promptly.
2. Seek Professional Help if Needed
If you encounter difficulties or are unsure about any aspect of the installation, seeking professional help is a wise choice. Mechanics have the expertise and tools to handle complex installations and can ensure that everything is installed correctly and safely.
3. Keep Records
Maintain records of all parts installed and any related maintenance work. Keeping detailed records helps track part replacements and can be useful for future reference or when selling the vehicle.
Conclusion
In conclusion, knowing how to install car parts correctly is crucial for maintaining your vehicle’s performance and safety. By following the steps outlined in this guide—preparing the tools, consulting the vehicle manual, ensuring safety, and performing the installation with care—you can achieve a successful installation. Regular maintenance and professional assistance, if needed, will further ensure that your vehicle continues to operate at its best. Embrace these tips to handle DIY installations with confidence and keep your car in optimal condition.